Import users
When you need to create many accounts at once, import them from a CSV file. All accounts of one import get the same permissions, groups and mail settings.
Prepare the CSV file
Each line describes one account, with four columns in this order, separated by semicolons:
- Language of the account:
de_DE,en_GB,fr_FR,pl_PLortr_TR - Name
- Username for signing in
- E-mail address
de_DE;Max Mustermann;mmustermann;max.mustermann@example.com
Save the file in the UTF-8 character set. You may include a header line with column names; the DocSecBox detects and skips it. The dialog also shows this format itself, under Info data structure.
Import accounts
- Open Settings › Overview › Users and click the upload icon (Import users from a CSV file). The Import users dialog opens.
- Under File, click Choose files and pick the CSV file. The dialog reports how many lines it read and how many of them are unusable.
- Decide what should apply to all accounts (see below).
- Click Start import. A progress bar shows how far the import has got.
- Check the result and click Close.
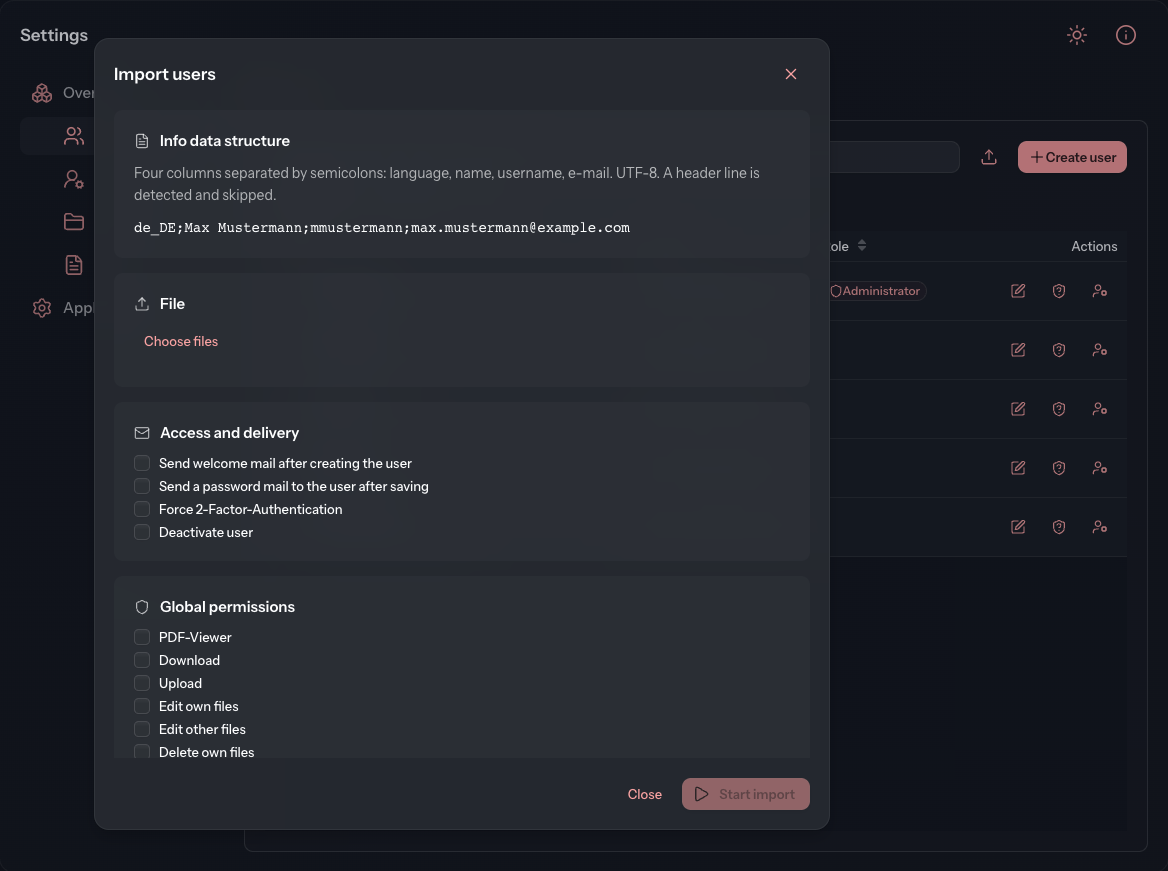
Start import stays greyed out as long as the file contains no usable line.
Settings for all accounts
| Card | Content |
|---|---|
| Access and delivery | Send welcome mail after creating the user, Send a password mail to the user after saving, Force 2-Factor-Authentication and Deactivate user. All four start switched off. |
| Global permissions | The eleven permissions as under Create user, here as checkboxes. Send notifications is preselected if your tenant has set this under Objects. |
| Groups | The groups every imported account should belong to. A search field helps with long lists. |
| Own group and folder | Create a folder and group for this user creates a group and a folder of its own for each account, named after the Name or the Username (Login). |
People need the mail for setting their password before they can sign in. As a rule, therefore, select Send a password mail to the user after saving.
Read the result
After the import, the dialog shows a summary, for example “12 created, 1 with a caveat, 0 not created.”, and below it every line of the file with Line, Username and Message:
| Message | Meaning |
|---|---|
| Created | The account exists, everything worked. |
| Created, with a caveat | The account exists, but something was missing, for example the password mail did not go out. The reason is shown beside it. |
| Line unreadable | The line was incomplete, the language unknown or the e-mail address invalid. |
| Not created | The account could not be created. |
If the password mail did not go out for an account, send it again through Manage account › Reset password.