Folder details
When you select a folder in the list, the detail panel to the right of the list shows its details. On the Info tab you rename, move or delete the folder and decide how long its files are kept.
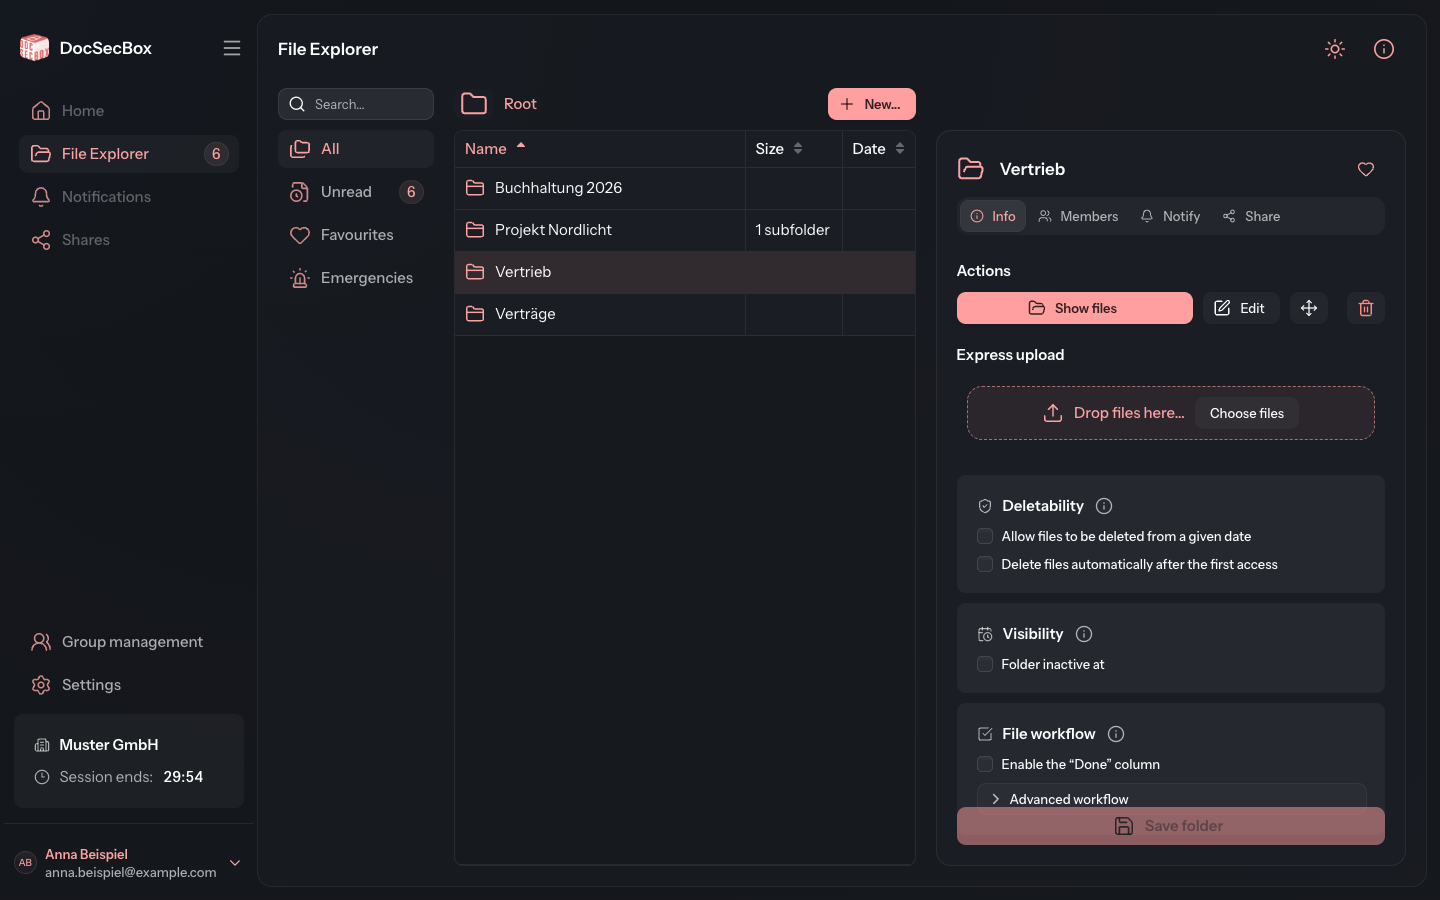
The detail panel of a folder has up to four tabs: Info, Members, Notify and Share. Which of them you see depends on your permissions.
What the Info tab shows
At the top are the rules that apply to the folder. Each line only appears when the rule is set: Emergency folder, Inactive at, Deletion after access (days) and Deletable from.
Below them come the Actions:
| Button | Effect |
|---|---|
| Show files | Opens the folder in the list. Missing when you are already inside this folder. |
| Edit | Opens the Edit folder dialog. See Renaming a folder. |
| Move | Opens the Move dialog. See Moving a folder. |
| Delete folder | Opens the Delete folder dialog. See Deleting a folder. |
If you may upload into the folder, the Express upload field follows: drag files onto it or click Choose files. More on this under Upload.
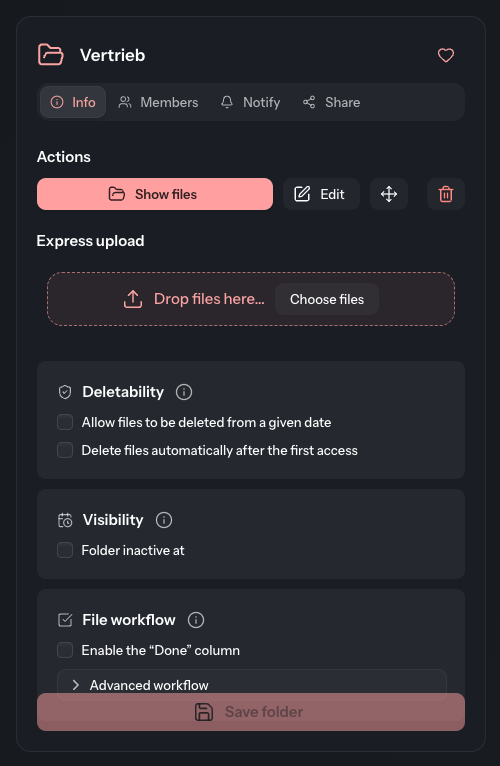
Edit, Move and the settings below them are shown to administrators and to users with the permission Create/edit folders for assigned groups. Only administrators may delete a folder.
Renaming a folder
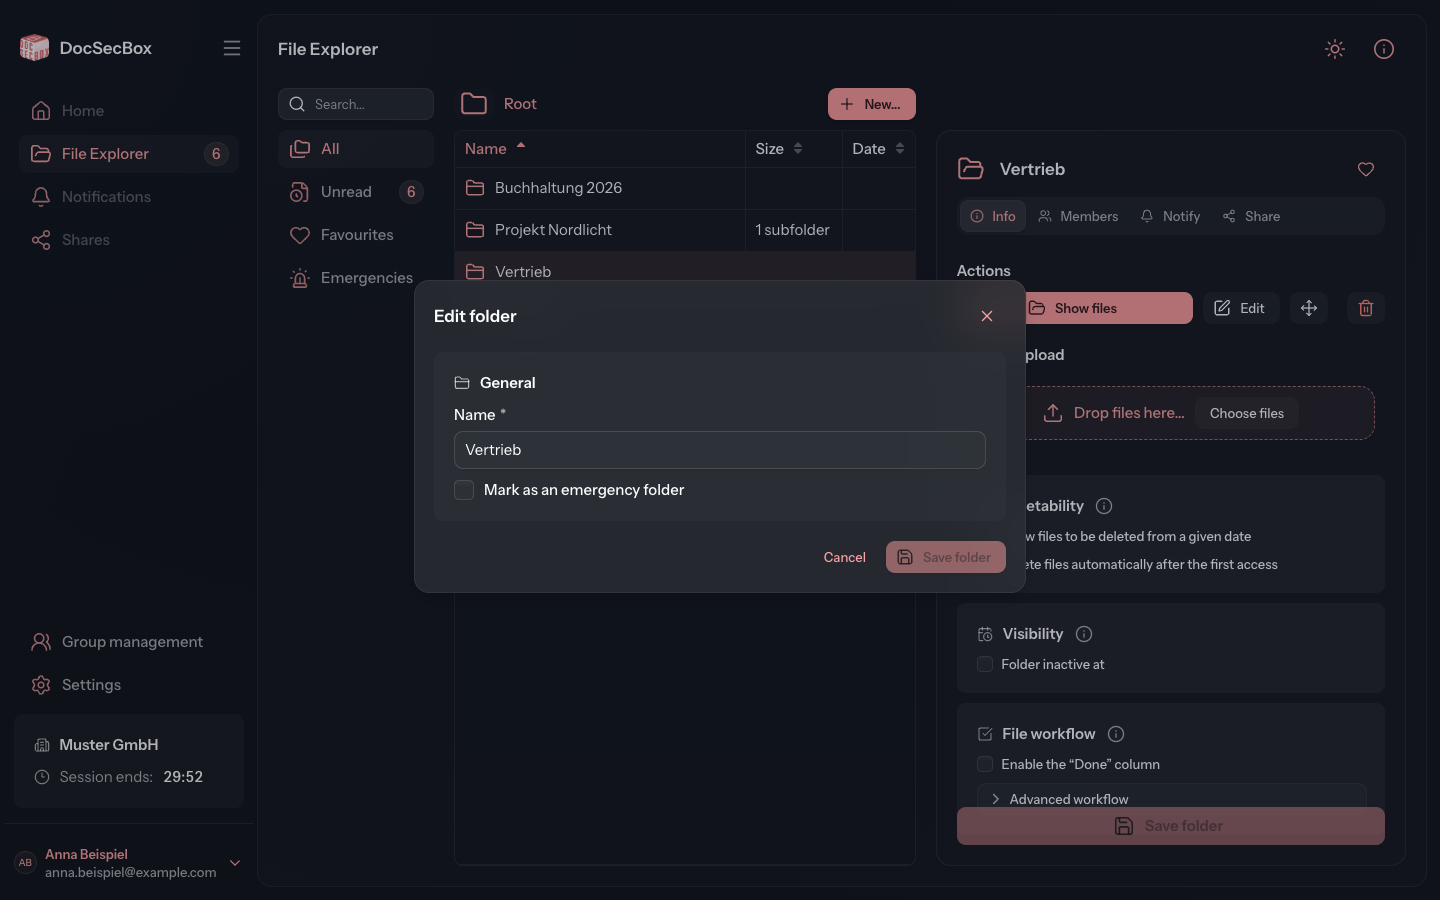
- Under Actions, click Edit. Alternatively, click the folder's name at the top of the detail panel.
- Change the Name.
- Click Save folder.
Administrators can set or clear Mark as an emergency folder in the same dialog.
Emergency folder
When someone uploads a file into an emergency folder, the DocSecBox alerts everyone who reaches the folder by text message and also by email. For this to work, your administrator must have set up text messaging (see SMS). In addition, every person needs a Mobile number in their profile.
Emergency folders carry the label Emergency folder in the detail panel. The Emergencies filter collects them in one list. More on this under Filters.
Setting retention and visibility
- On the Info tab, enable the rule you want in the Deletability or Visibility card.
- Enter the date or the number of Days.
- Click Save folder. The button stays greyed out until you have changed something.
| Setting | Effect |
|---|---|
| Allow files to be deleted from a given date | Before this date, the folder's files cannot be deleted. The folder itself can only be deleted from this date on as well. |
| Delete files and subfolders automatically on that date | Appears once the rule above is active. On the date entered, the DocSecBox deletes all files and subfolders of the folder. |
| Delete files automatically after the first access | Each file is deleted the entered number of days after it was first opened. |
| Folder inactive at | From the date entered, the folder disappears from the File Explorer. |
| Enable the “Done” column | In the File workflow card. Switches on the column in which files are marked as done. The way into the folder must grant it as well, see Granting the “Done” column. |
| Advanced workflow | In the File workflow card. Holds the folder's status templates. |
Automatic deletion
Whatever the DocSecBox deletes under these rules is gone for good. Check the date and the number of days before you save.
Moving a folder
- Under Actions, click (Move).
- Choose the Target folder.
- Click Move.
The folder moves together with all its files and subfolders. Once you have chosen a target folder, the dialog states how many of them move along.
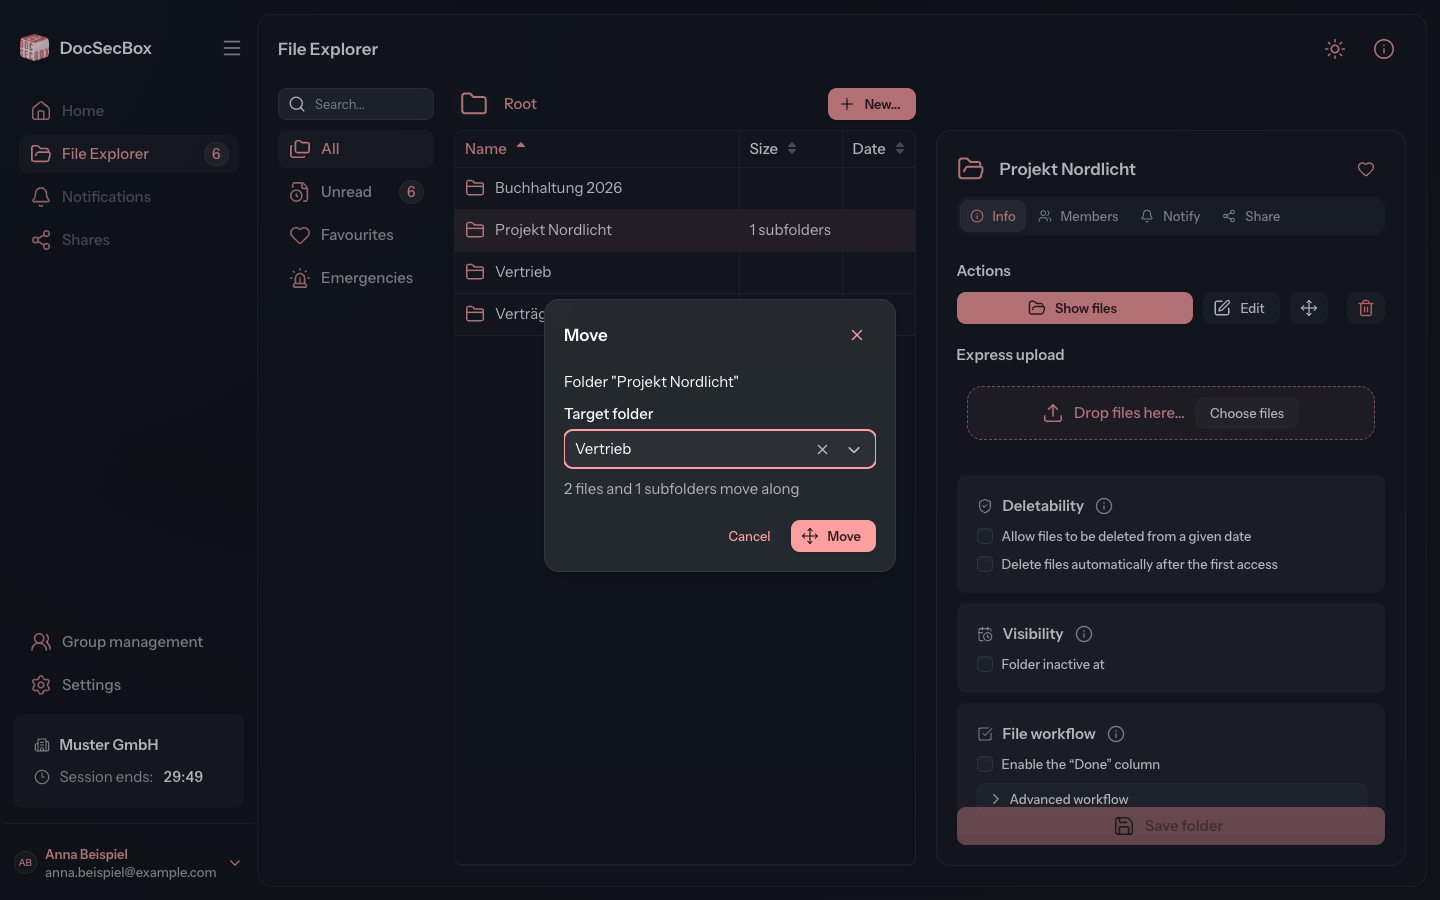
You can also move a folder with the mouse: drag it in the list onto another folder or onto a part of the path bar. The dialog then only asks you to confirm. This is the only way to move a folder to the top level: drag it onto Root.
Deleting a folder
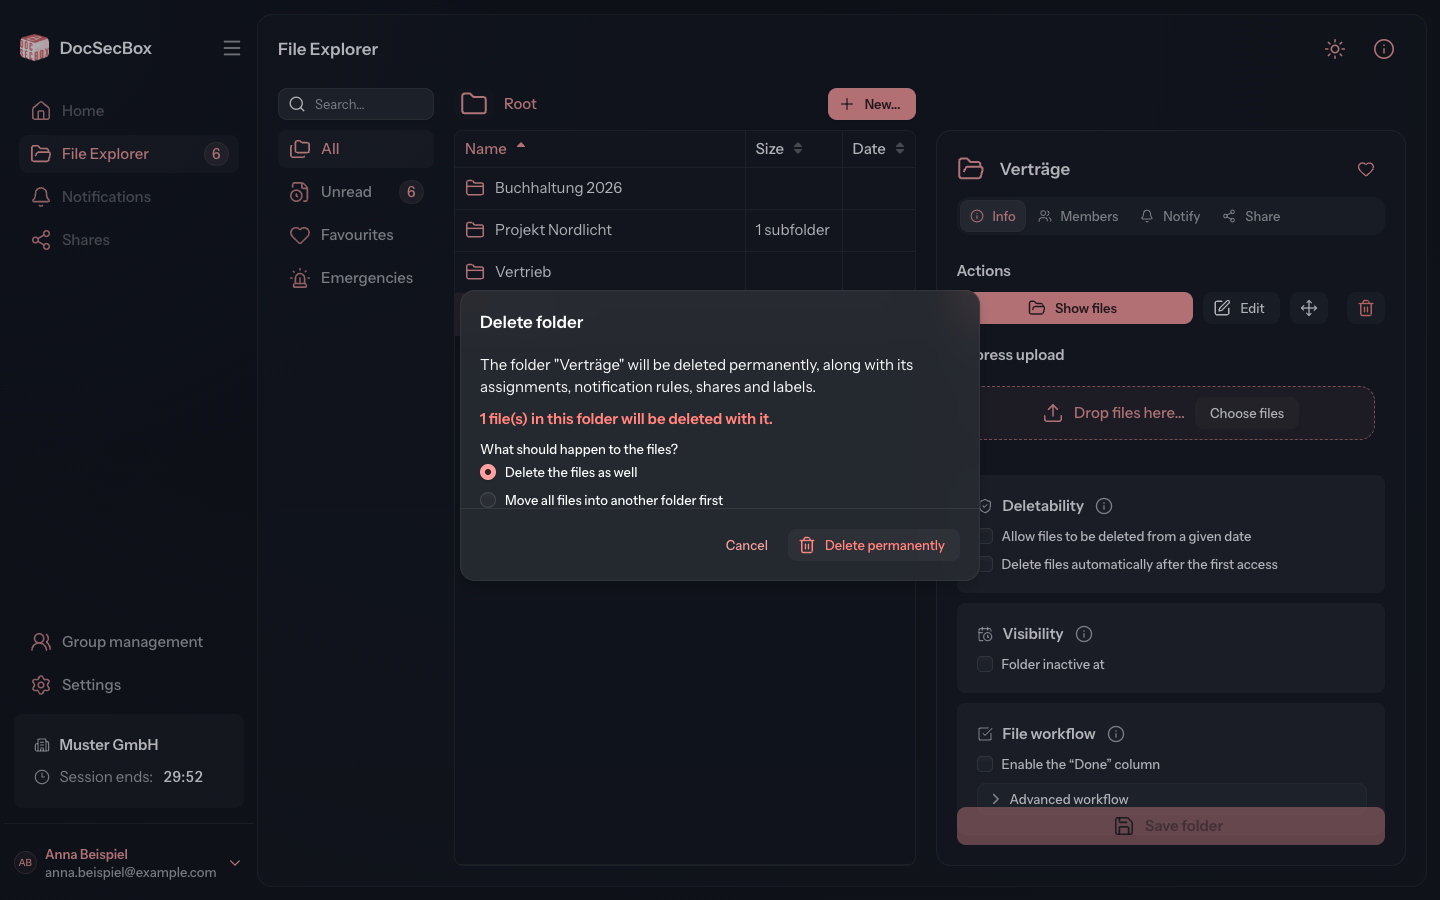
- Under Actions, click (Delete folder).
- If the folder contains files, choose under What should happen to the files? either Delete the files as well or Move all files into another folder first. In the second case, choose the Target folder.
- Click Delete permanently.
The dialog states how many files and subfolders will be deleted along with the folder. If the delete button is greyed out, a deletion lock still applies to the folder. The hint on the button names the date from which deleting is allowed.
Permanent deletion
The folder is deleted together with its subfolders, assignments, notification rules, shares and labels. This cannot be undone.
See also
- Members: who sees the folder and what they may do in it
- Notify: automatic emails about new files
- Status templates: statuses for the folder's files
- Moving a file