Upload
In the DocSecBox, files always go into a folder. Everyone assigned to that folder then sees the file in their list. There are two ways: quickly, through the drop area below the list, or through the Upload files dialog when you want to add details to the file straight away.
You can only upload into folders for which you have the Upload permission (see Members).
Upload files quickly
- In the list, open the folder the files should go into.
- Drag the files onto the Drop files here… area below the list. Or click Choose files there and select the files.
- The DocSecBox uploads the files straight away and shows the progress below the area. The new files then appear in the list.

Uploaded this way, each file gets its file name as its title. If an automatic notification is set up for the folder, it goes out straight away (see Notify). You can change the title, the description and the other details later in the file view.
The same drop area is also on a folder's Info tab, under Express upload. While a folder is still empty, Choose files also appears in the middle of the list. On a smartphone there is only the button, no drop area.
Upload files with details
Take this way when the files should get a title, a description or an identifier right away, or should only become visible from a certain date.
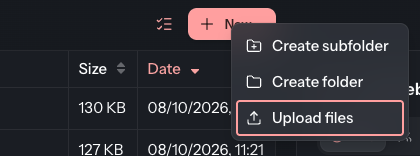
- In the path bar, click New… and choose Upload files.
- Check the Target folder. If you are not inside a folder at the moment, choose it here.
- Drag the files onto the Drop files here… area, or click Choose files. The upload starts straight away.
- Fill in the details you need. All fields are optional.
- Click Save file.
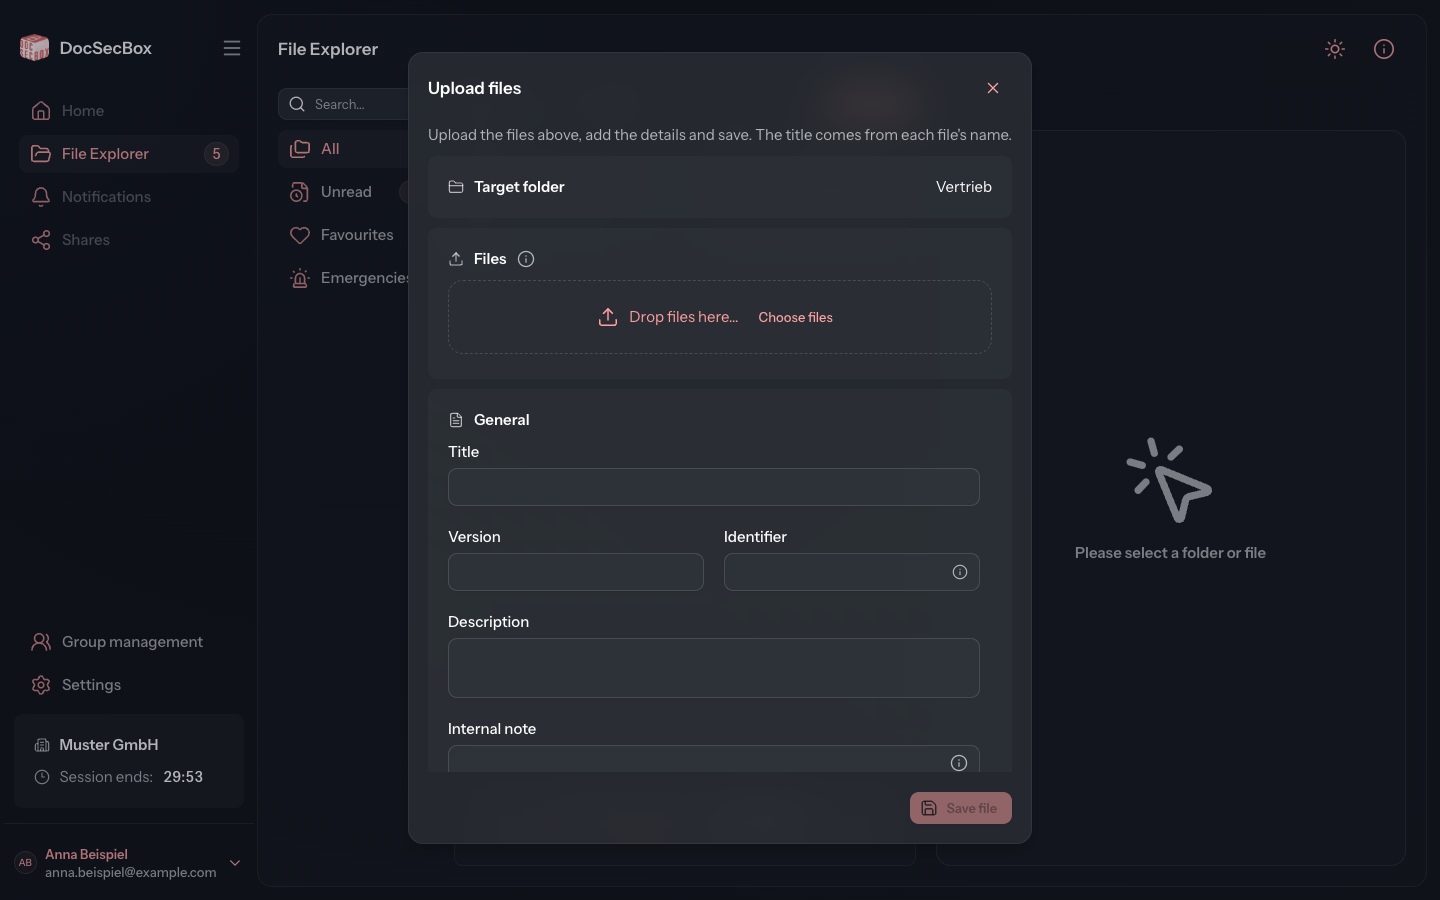
Until you save, nobody else sees the uploaded files, and no notification goes out. Save file applies your details to all files of this upload and only then sends the notification.
The details in the dialog
| Field | Meaning |
|---|---|
| Title | The name under which the file appears in the list. See below. |
| Version | Free text, for example a version number. |
| Identifier | A keyword that makes the file findable in the search, for example “Invoices” or “August 2026”. |
| Description | Free text shown on the file's Info tab. |
| Internal note | Visible to administrators only. Others do not see the field. |
| Allow download | When the checkbox is cleared, recipients can only view the file, not download it. |
| Delete file after the next access | The file is deleted as soon as someone next opens or downloads it. |
| Activate this file once this date has been met: | Until that date only you and the administrators see the file, marked Not active. The notification only goes out once the file becomes active. |
| Deactivate this file once this date has been met: | From that date on only you and the administrators see the file. It is not deleted. |
To set a date, first select the checkbox; the date field then appears. The deactivation date has to be after the activation date.
What happens to the Title depends on how many files you upload:
- One file: the Title field shows the title the DocSecBox derived from the file name. You can change it before saving.
- Several files: the field is locked and shows The filename is used. Each file keeps its file name as its title.
- If you enter a title before choosing files, you can upload only one file.
Deleted after access
With Delete file after the next access, the file is gone for good after it is next opened or downloaded. This also applies to an access through a share. The small preview on the Info tab does not count as an access.
Closing the dialog without saving
If you close the dialog after files have already been uploaded, the DocSecBox asks in the Not saved dialog:
| Button | Effect |
|---|---|
| Back | You return to the dialog and can still save. |
| Discard | The uploaded files are deleted again. The button is missing if you may not delete in this folder. |
| Keep | The files stay with their file name as the title; your details are not applied. The notification goes out now. |
If the file name already exists
Uploading never overwrites an existing file. If the folder already holds a file with the same name, the DocSecBox creates the new file alongside it. It then asks in the Name already taken dialog what should happen:
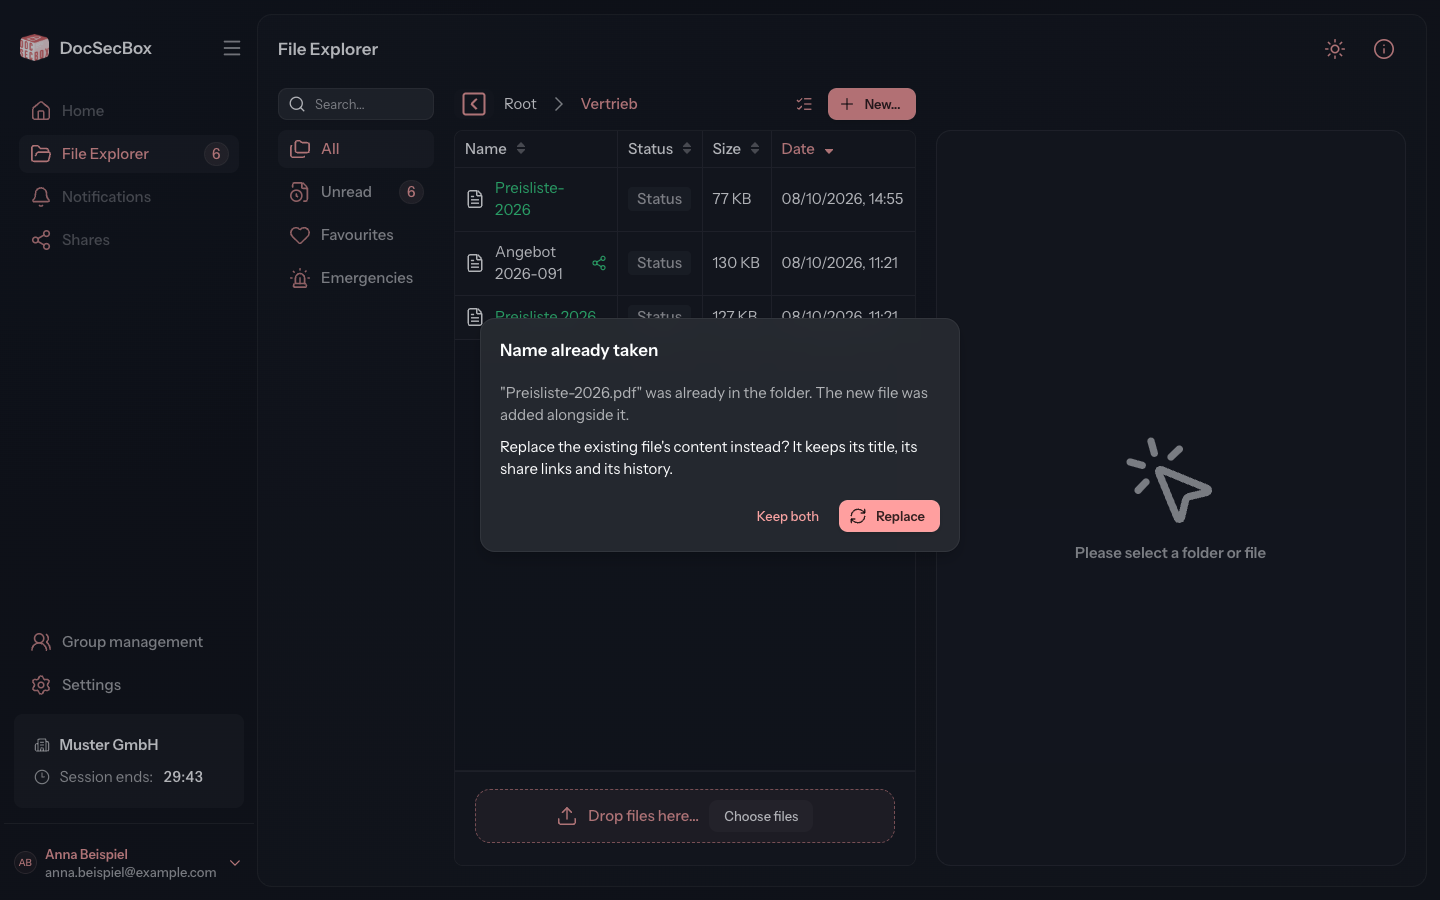
- Keep both: both files stay. The new file is announced as usual. The same happens if you simply close the dialog.
- Replace: the existing file takes over the content of the new one, and the new one disappears again. The existing file keeps its title, its share links and its history. No notification goes out, but the file counts as unread again for its recipients.
Whether replacing is possible depends on your permissions and the folder's rules. If it is not, the dialog says so and only offers Close. If several files are affected at once, the dialog names all of them in one question.
Large files
Paid add-on module
You can always upload files up to 16 MB. The DocSecBox accepts larger files only if your tenant has the paid add-on module Large files. Without the module, the message “This file is too large, and uploading large files is not enabled for this tenant.” appears.
A large file is only available for a limited time. The message after the upload states how many hours. After that, the DocSecBox deletes the file automatically.
Good to know
- If the DocSecBox rejects a file, a message states the reason, for example an empty file or a missing permission.
- If you may not upload into the current folder, Upload files in the New… menu is greyed out. Point at New… with the mouse to see the reason.